Monday, November 8, 2010

Overview of Label

Creating A Label:
 
1] Labels are used to identify form content; They are used for prompts and to provide extraneous information on forms.  To create a label on the form, drag a Label from the Toolbox to the Faculty form. We are about to create a Label for a prompt -> First Name. (See Below!)

 
Moving A Label About The Form:
 
1] The label is an object created on the form with the line of code:
    this.label1 = new System.Windows.Forms.Label();
2] When you select the form with the mouse, you can see a box that identifies object label1. A dark background can make this box more difficult to identify. (See Below!)


3] Note the appearance of the cross-hairs icon when the mouse is moved over object label1 below. 


4] If you right mouse click on the label, you can drag it to the desired location on the form. Note the box that is formed around the label as you move it.


Changing The Label's Font:
 
1] Go to the properties panel for the label (right mouse clicking on the label. --> Select Properties)       (See Below!)

2] Select the Font Property. You can see that the current font is 12pt Ariel bold.  Suppose we wish to change the font to Comic Sans MS.  Hold down the font selector    (See Below!)

3] Select the Comic Sans MS font - Regular style - 16 point. Using the mouse,  select/push the OK button. (See Below!) 
4] Note the font change below.
5] You may select select and change multiple labels, using the procedure outlined above, at one time.
6] When doing multiple labels, it is often more efficient to set the Font associated with the form; thus it becomes the default.
 
Changing The Label's Color:
 
1] Return to the properties panel for the label (right mouse clicking on the label. --> Select Properties).  Select the ForeColor Property. You can see that the current forecolor is white.  Suppose we wish to change the forecolor to yellow.  Press the color selector drop-down control    (See Below!)
and select Yellow from the Custom Color Pallet. (See Below!) 
2]  Note that the label color has been changed below!
 
 
Changing The Label's Background Color:
1] Return to the properties panel for the label (right mouse clicking on the label. --> Select Properties).  Select the BackColor Property. You can see that the current backcolor is navy.  Suppose we wish to change the forecolor to purple.  Press the color selector drop-down control     (See Below!)


and select a purple from the Custom Color Pallet. (See Below!) 


2]  Note that the label color has been changed below!


Changing The Label's Text:
 
1] Return to the properties panel for the label (right mouse clicking on the label. --> Select Properties).  Select the Text Property. You can see that the current text is label1.  Suppose we wish to change the text to First Name. Change the Text Property to First Name. (See Below!)


2]  Replace button1 with First Name. The label is now a prompt for the First Name. (See Below!) 


4] This form still executes; try it. Note that the label object is no longer outlined. (See Below!)

Close the Faculty form

 
Naming A Label:
 
1] Some developers name each and every object on a form; I name almost every object, except labels. If you wish to change one or more of the label properties with program code, it should be named; otherwise I encourage you to consider it optional.
2] The name should contain no blanks. Suppose we wish to name the label - labFirstName.
3] Return to the properties panel for the label (right mouse clicking on the label. --> Select Properties).  Select the Name Property. You can see that the current name is label1. Change the Name Property to labFirstName. (See Below!)


2]  You can see that the label below has now been named.


Sunday, November 7, 2010

About Label Control in windows Application

Label Control.

The Label control is used to display text to the end user for a control descriptive instruction. This might be a instruction on a TextBox field as.

Labels within software aplications are used mainly as information 
resources or instructions. The Micorosoft .net Framework 3.0 and 2.0 
allow the creation and development of good software.

The first TextBox is labeled with "First Name". The Second TextBox is labeled with "Surname". The ComboBox is labeled with "Select Age". This is the typical use of the label. To label controls and give instructions.

The label can take the form of Text only, Image and Text or Image only.

Use Microsoft Visual Studio 
2005 to create or develop software applications. Visual Studio has a set
 of robust controls including the Label Control. Most controls support 
images.Namespace: System.Windows.Forms
Assembly: Systems.Windows.Forms.dll

using System.Windows.Forms;
Calling: System.Windows.Forms.Label


Creating a new System.Windows.Forms.Label control.
Label label1 = new Label();

Adding the Label control to a Windows form.
this.Controls.Add(label1);

Assigning text to the Label control.
label1.Text = "DotNet Controls";

or

select label control right click on label control

select properties, in properties select text
and write your text

Thursday, November 4, 2010

how to use Visual Studio 2008 IDE

The IDE

Now that you have finished choosing and downloading a VS IDE, we can now start discussing the parts of the IDE itself. So start up the Microsoft Visual Basic 2008 Express Edition from your Start > All Programs Menu, and you will have an Application similar to the image below
On the IDE, the Start Page shows your recent saved projects and news about Express Edition (if you used Express Edition). If you want, you can register your copy of Express Edition (click Help > Register Product on the main menu) for you to have access to samples and kits from Microsoft.

Now, create a New C# Project by pressing Ctrl+N or Selecting File > New Project on the main menu, the New Project dialog box will appear (see image below). This dialog box lets you choose the template (type of project you want to make) and enter an application name for the new project. Just make sure the Windows Forms Application is selected, then enter any application name you want (I left it with the default name), if you are sure with the name, click Ok.

The IDE seemed to have not changed at all, but if you look at the tabs and the right-side of the IDE, you now have Form1.cs [design] on the tab, and the Solution Explorer and Properties Windows on the right (highlighted with red borders on the image). Select the Form1.cs tab to be able to see the how the form looks like.
Clicking the toolbox tab on the left side of the IDE expands the toolbox window and clicking the pin icon causes it to dock (see image below). The toolbox is a complete set of controls that you can drag and drop on your created windows form (also seen on the image)
Now that the Toolbox is out and shown on our IDE, we can now start using different controls on our windows form.

Form Controls

Now we will now try to learn and discuss ways on putting controls on our windows form, let’s start with a couple of basic form controls, so click on Common Controls tab on the Toolbox window to show some controls we can use.

To add a control, you can either select it from the toolbox, drag and drop on the form or double-click it and it will automatically be added on your form. So, lets try and add 3 labels, 3 textboxes, and a button on Form1 by double-clicking the controls the Toolbox.

Wednesday, November 3, 2010

Microsoft Visual Studio 2008 Installation on Windows 7 - Installing VS2008 SP1


This Windows 7 tutorial is going to show how to install Visual Studio 2008 on Windows 7.
I'll install Microsoft Visual Studio 2008 Team Suite Edition on Microsoft Windows 7 Ultimate.
I had a clean install of Windows 7 on my new computer and I tried to install Visual Studio 2008 on Windows 7. I managed installing VS successfully with a simple and plain installation process.
I have an .iso file of the VSTS2008 Team Suite and extracted it on a folder. Within the extracted folder the installation file is setup.exe install file.
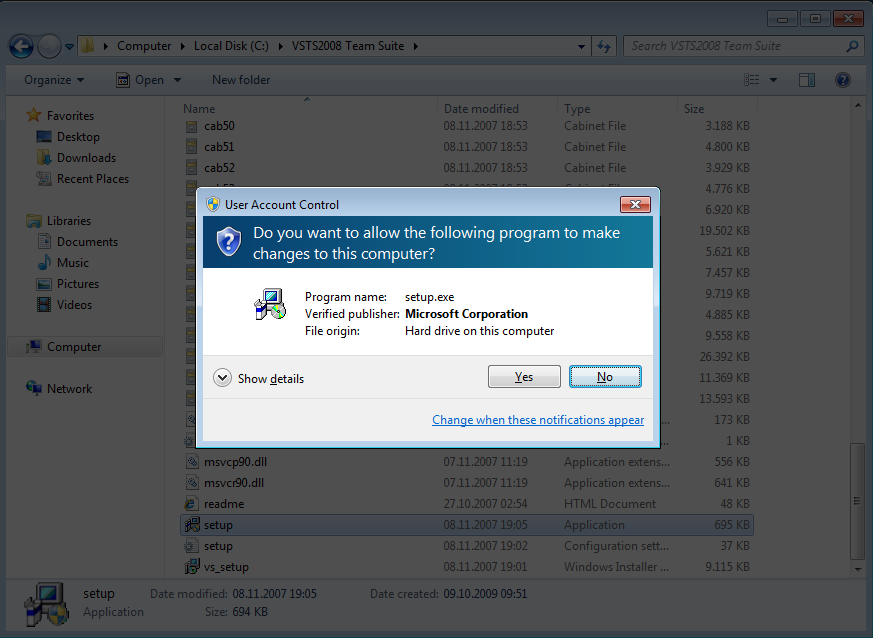
When I double click to run the setup.exe file, the following User Account Control (UAC) screen is asking me if I allow the setup.exe program to run.
Click "Yes" to continue with Visual Studio 2008 installation further on Windows 7.


user-account-control-for-visual-studio-2008-setup.exe-on-windows-7

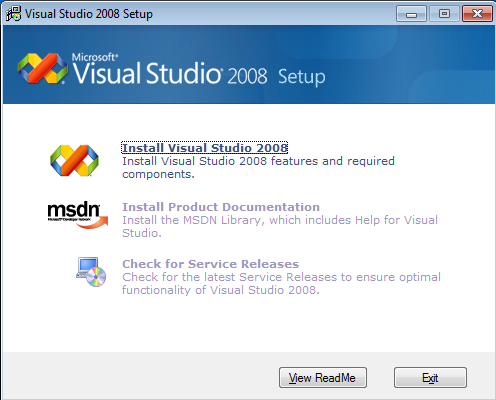
The first screen in Visual Studio 2008 Setup is the below setup dialog screen.
Click the "Install Visual Studio 2008" link in order to start VS2008 on Windows 7 installation process.

Microsoft-Visual-Studio-2008-Setup-on-Windows-7-Ultimate
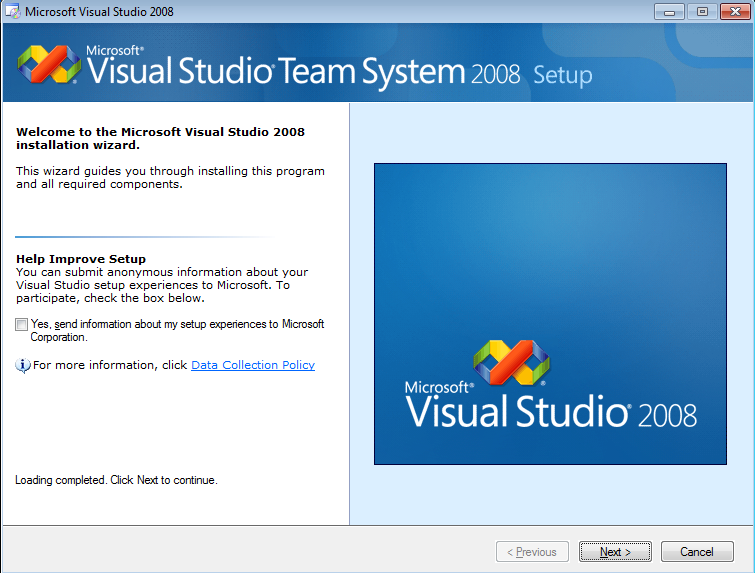
Microsoft Visual Studio Team System 2008 Setup wizard begins with the confirmation if you want to help improve setup of Visual Studio 2008.
If you agree to submit anonymous information about your Visual Studio setup experiences to Microsoft, mark the checkbox "Yes, send information about my setup experiences to Microsoft Corporation."
Microsoft-Visual-Studio-Team-System-2008-Setup-on-Windows-7-Ultimate

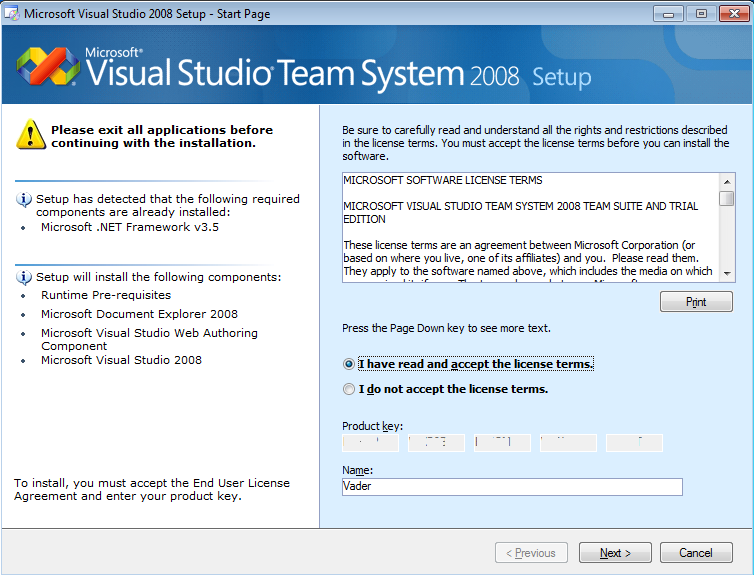
The next screen in the VS 2008 setup wizard requests you to confirm that you have read and accept the licence terms.
You should also supply the Microsoft Visual Studio 2008 product key.

MS-VS2008-VSTS-Setup-product-key


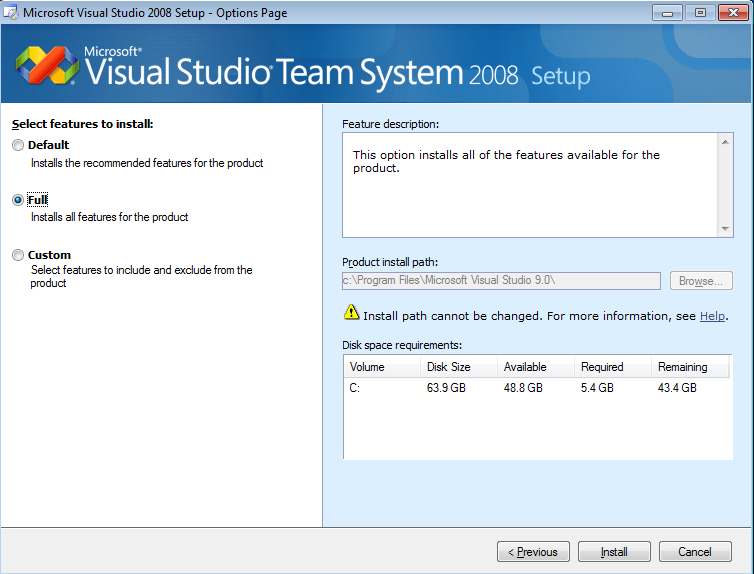
This step is which you select the Visual Studio 2008 features to setup. You have two quick options first the default installation and the full installation.
Default installation will install common and recommended VS2008 features on the other hand full installation will install all the features of MS Visual Studio 2008.
You can configure VS2008 installation in more detail by selecting the third option, Custom installation.
The VS 2008 installation path is default "C:\Program Files\Microsoft\Visual Studio 9.0\" and can not be altered.
You can see the required disk space for each install option on the right bottom part of the setup wizard.
Actually I did not change the default install parameters in order to avoid any Visual Studio 2008 Installation problem.

select-vs2008-features-to-install-default-full-custom

I choosed to select all Visual Studio features so selected Full installation option which requires 5.4 GB disk space.
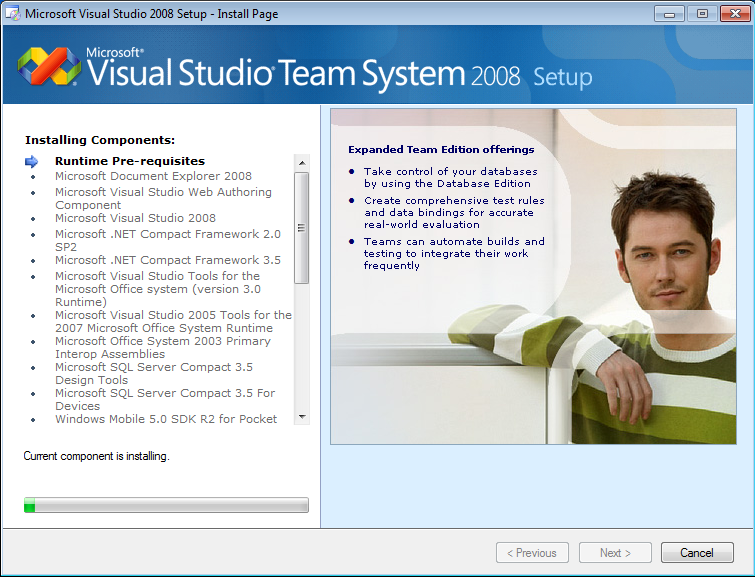
And the Microsoft VSTS 2008 installation process starts as seen in the below screenshot.

Visual-Studio-Team-System-2008-installing-components

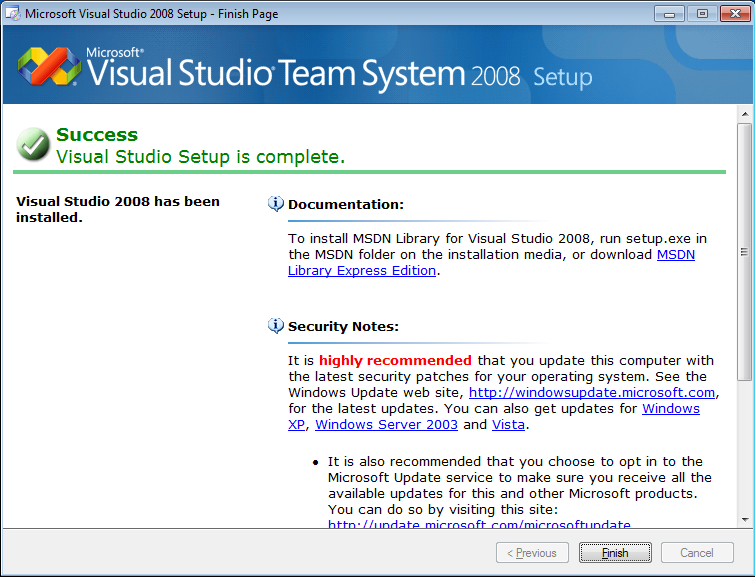
And the installation finished within one screenshot as you see here :)
Unfortunately if you are working on a Virtual PC, this section might take a long time perhaps more than 2 hours according to your resources.
But when I installed VS2008 on my desktop computer with a powerful configuration it lasted less than half an hour.

vs2008-visual-studio-setup-is-complete


After the VS 2008 installation is completed successfully on Microsoft Windows 7 Ultimate operating system, it is time for an update or installing the product documentation like help documents, tutorials and samples, etc.